Look at This Piece of Potterythis Piece of Art Was Created Using Apex
Nigh the Author, Alvaro Claver
 I am a Spanish 3D artist with a background in Fine Arts and Photography. I worked every bit a cameraman and lensman in several movies and short film productions and also every bit a Photography Director in some of them. I have traveled around the world several times, both for pleasance and for work recording documentaries for the Spanish television. So far I accept lived in five different countries and I had fun in every unmarried 1 of them, even when working as a paparazzi in London for a year!
Very recently, I have graduated from Think Tank Preparation Centre and specialized in texturing and 3D modeling. Being trained nether one of the all-time texture artists in the world, Justin Holt, I am at present gear up to go where in that location be dragons.
I honey learning as much as teaching and, whenever I have time, I also mentor students. This way l am giving something dorsum to the good karma I've got and then far while enjoying doing it.
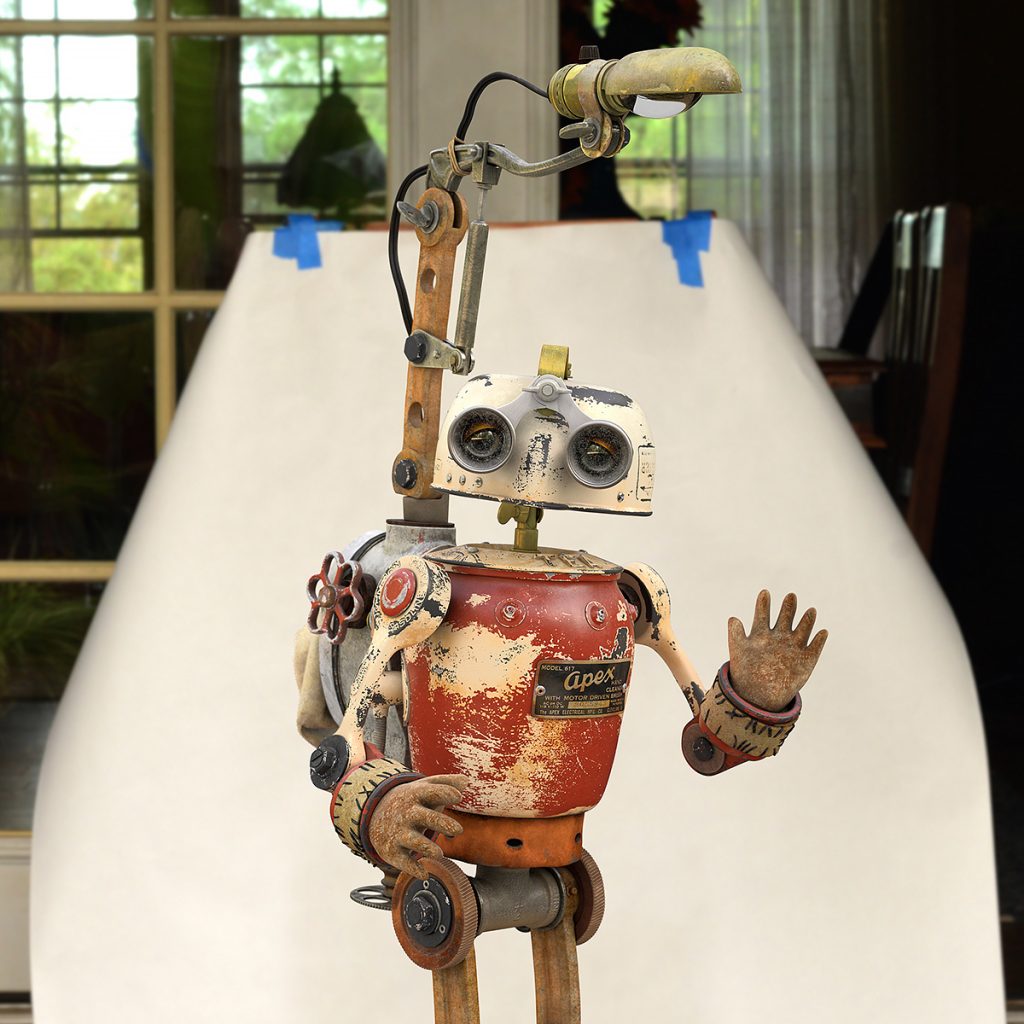
The making of Noon The Robot
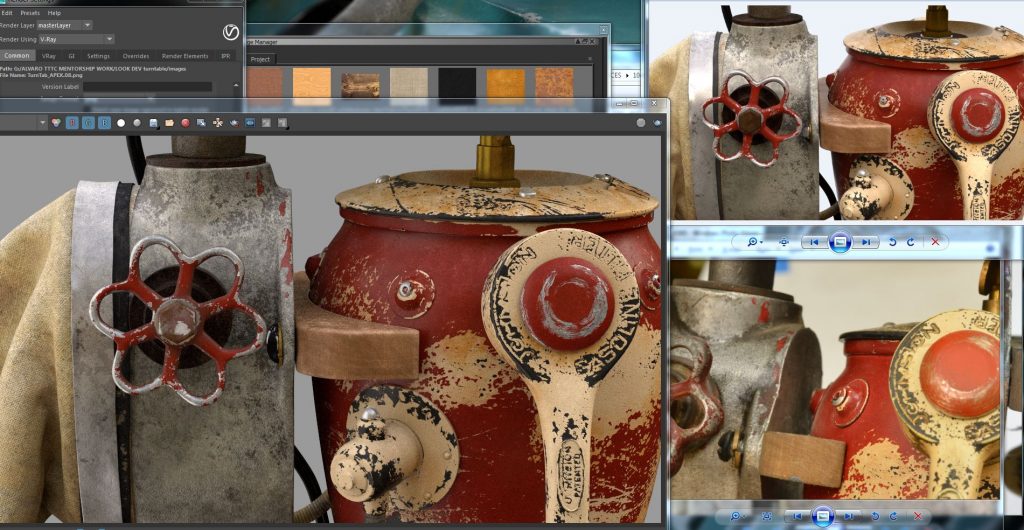
I created this piece for my demo reel. I contacted Dan Jones, the artist who created the original physical Apex robot sculpture, and asked him if I could digitally recreate it. He agreed, so I flew to California to come across him. I was lucky to exist able to take photos and shoot video from the original, which is a luxury you don't usually have when you work on a large production.
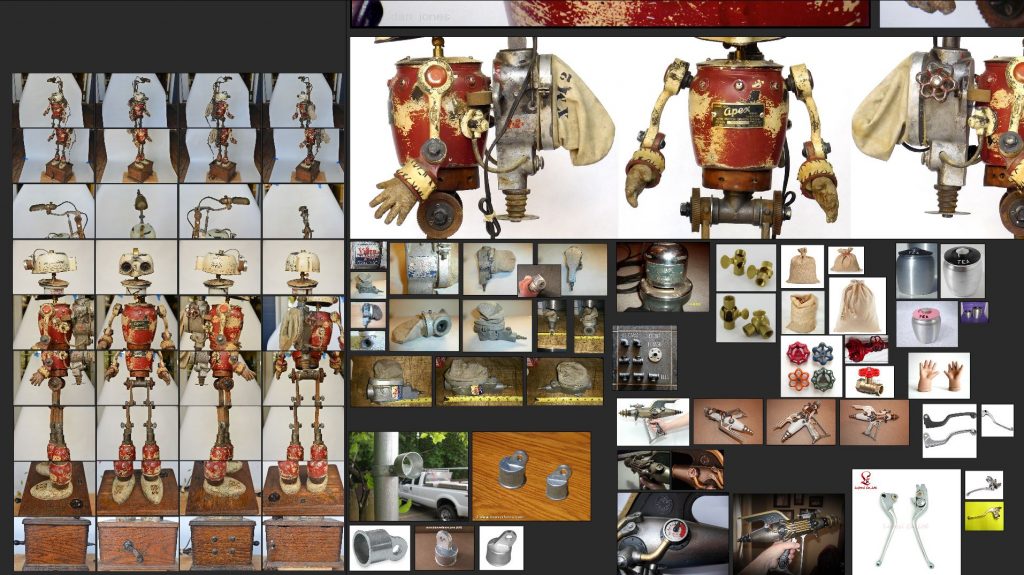
I was responsible for modeling, texturing, lighting, shading, blitheness and comp… basically everything! I already knew that I needed the photos in order to create masks for projecting item in Mari, so choosing the right lens was disquisitional. I besides gathered references for the dissimilar parts and materials to help with modeling and look dev.
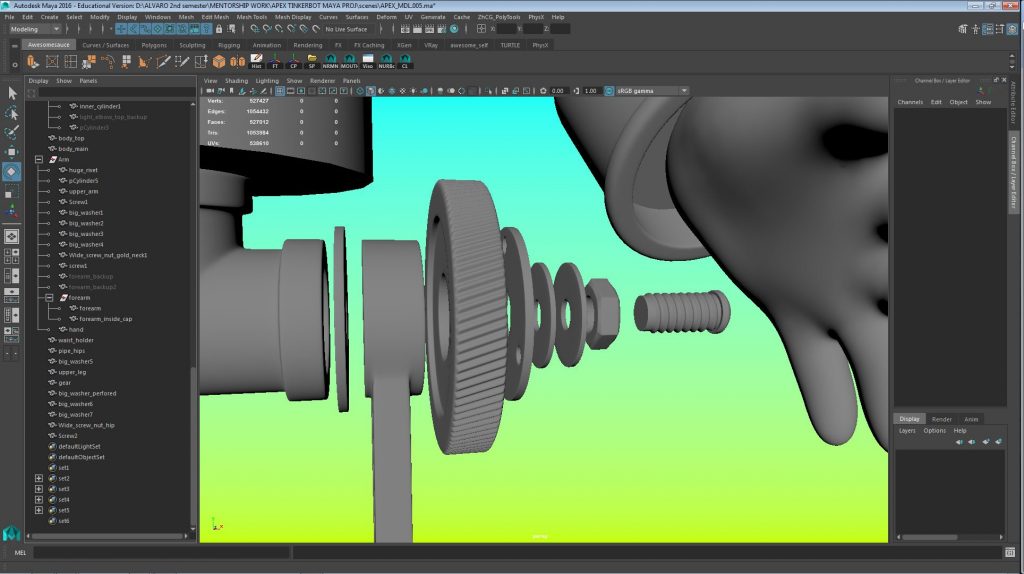
Afterward gathering the reference material I was able to kickoff modeling Apex. This office was fairly direct forrard. I had to make sense of topology in every moment, and proceed an heart on the volumes and shapes.
For unwrapping the UVs I grabbed a cup of tea (no, beer doesn't make you lot more productive) and listened to my favorite music with a adept pair of headphones. I like it every bit most of information technology is a mechanical process, but at that place is a fair corporeality of problem solving. It takes some time, but it's a crucial step for preparing the mesh for texturing. There are many things to consider, like how much resolution will you lot demand depending on the size on screen, proportion consistency amid meshes, and the orientation in the UV space.
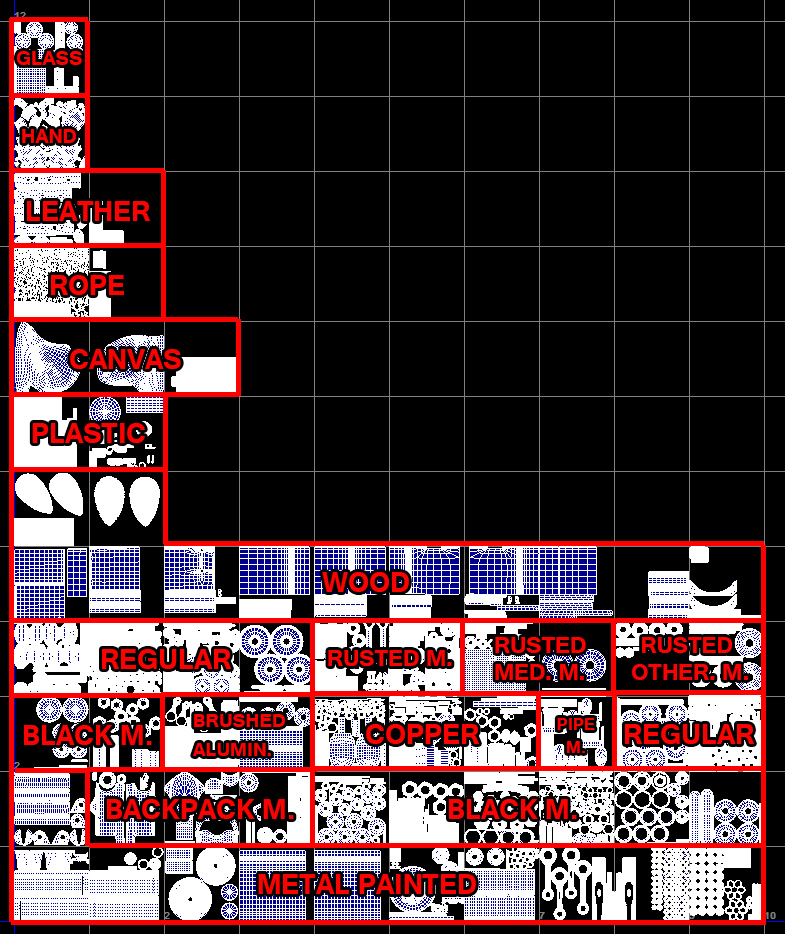
In my case I distributed all the parts beyond 63 UDIM tiles, ordering them in rows past material. All maps are in 4k.
Now my favorite office of the whole procedure: texturing. I used Mari as it'southward the most widely used texturing software in the moving picture manufacture. Plus it works similar magic and allows me to work in an organized and non destructive way.
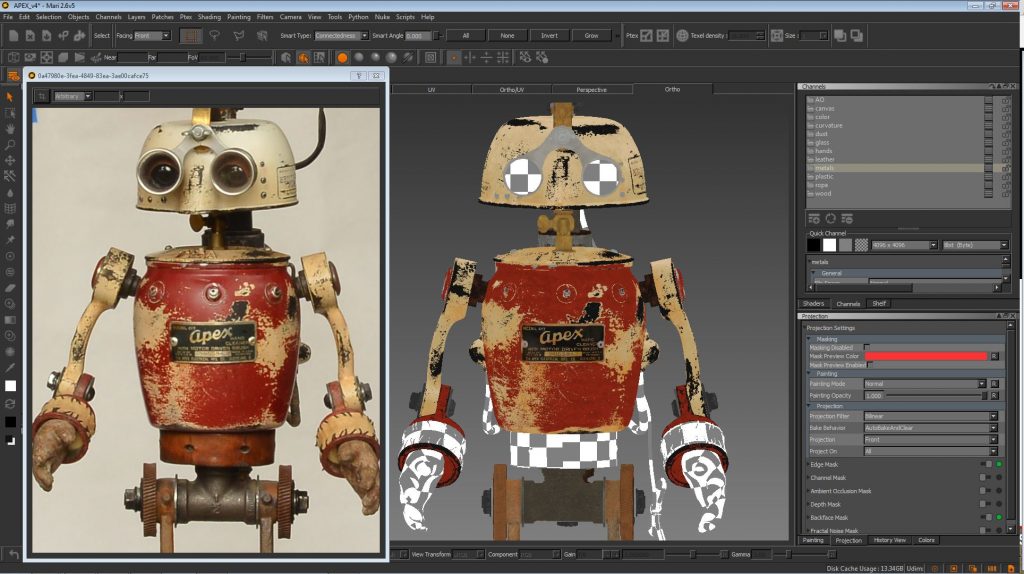
My workflow involved creating multiple channels for every textile including diffuse, specular, glossiness, and crash-land. Some of the objects in the scene, similar the main body piece, take 4 different layers: an aluminium base, black patina on top of information technology, and then 2 more paint layers – cream and cerise. It is very of import to plan in advance for this! I had to create multiple black and white masks in Photoshop to attain a layering similar to the reference.
Rendering with V-Ray for Maya
For Noon the Robot my renderer clearly had to be V-Ray for Maya for its realistic imagery, fast rendering, and responsive look development.
Apex has metals, wood, plastic, fabric, glass, and many other circuitous materials. For the shaders I used both the default V-Ray material (VRayMtl) and blend material (VRayBlendMtl).
Don't underestimate the ability of the basic VRayMtl. Information technology is extremely powerful and you can recreate virtually whatever textile with it.
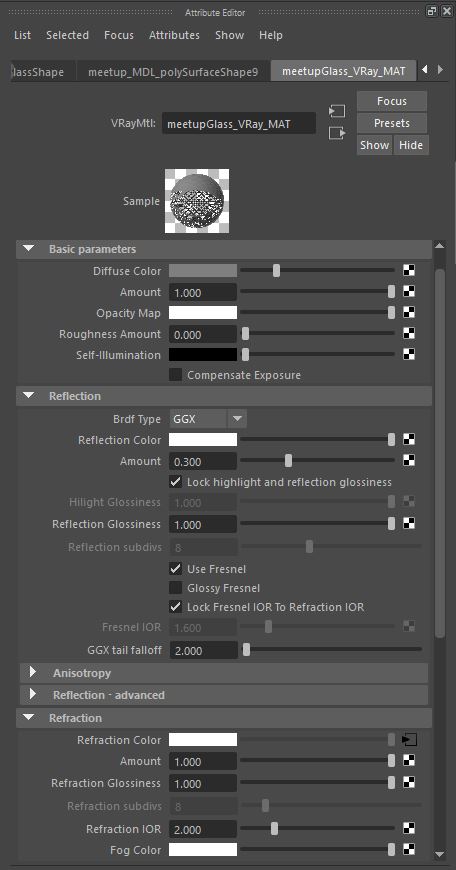
I tin't stress enough how of import it is to name a material as shortly as you create it. For the naming convention I employ description_VRay_MTL, and description_VRayBLEND_MTL. I tend to capitalize when it'southward a grouping or, in this instance, a blend fabric belongings other shaders inside. Save yourself time and headaches by having a clear naming convention you can easily recognize when using the Hypershade. Name your linked files, likewise as you might exist able to share them between shaders. Otherwise y'all will end up with a long list of "fileXX", and you will not know what is what.
In the basic parameters, I only utilise the Lengthened Color and Corporeality fields. I set the diffuse, and if I'm using a plain grey color instead of a map, I use the Amount for finessing it. Stay away from Opacity here, and use Refraction instead.
For reflection parameters, I ever use GGX microfacet distribution for the Brdf (Bidirectional Reflectance Distribution Function). This is proven to have one of the best specular distribution models, with a brusque peak in the highlight, and a long tail in the falloff.
If you are working with a physically based workflow and creating metallic, plug your color map into Reflection Colour, leave Diffuse Color black, or close to black.
It is great to create layered shaders with the blend material , and to be able to control it with masks. Bear in heed that here layers are named coats, and the order is inversed compared to Photoshop, so the base will be on top. Also recall to plug the black and white masks into the blend amount department below every new glaze or layer: blackness means no consequence so it will show the coats or layers underneath.
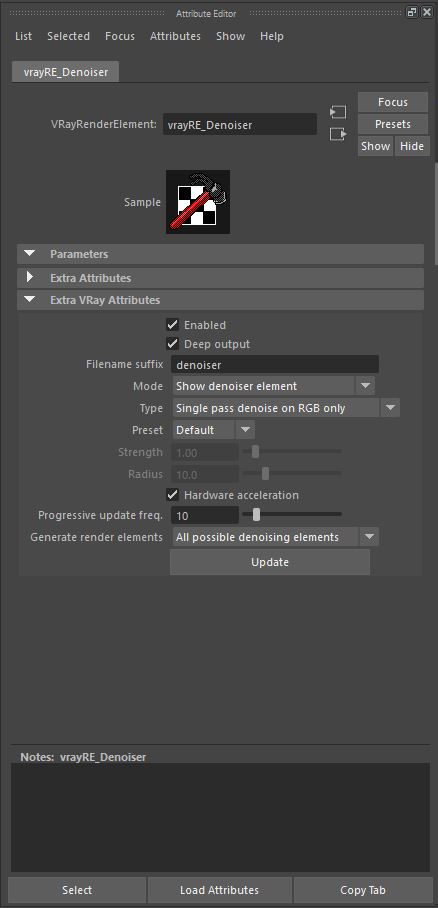
The new denoiser pass in Five-Ray 3.5 for Maya works a amuse. You can increase the threshold in the image sampler slightly and it will remove some of that annoying noise. Auto works from the get go, but don't forget to play with the parameters in the attribute editor. Give it a try, and see if you tin add together it to your workflow.
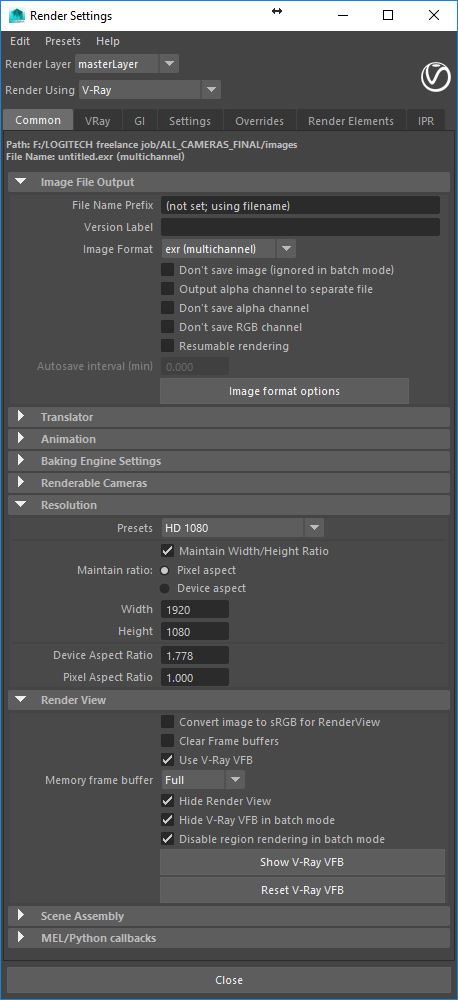
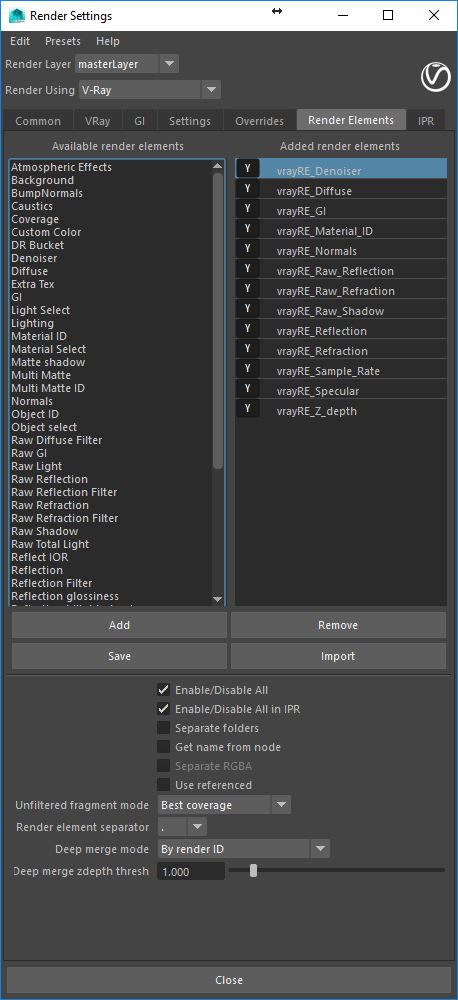
If you save your renders in multichannel EXR you will have all your passes in one file for every frame. You can hands shuffle them out in Nuke with the shuffle node when comping.
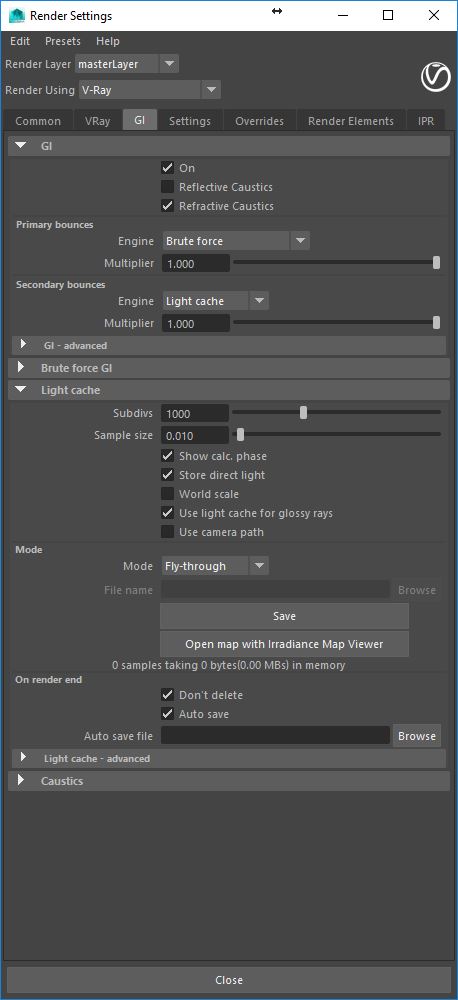
For lighting, I used a classical set upwards: an HDR very similar to the location where I took the photos, and a couple more expanse lights to subtly highlight specific points. As I used a white properties to have the photos in San Diego, I created a bounciness light with the GI (Global Illumination) on the back of the figure. This came very handy to cache a fly-through pass on the very first frame of each camera and then load it for the rest of the sequence.
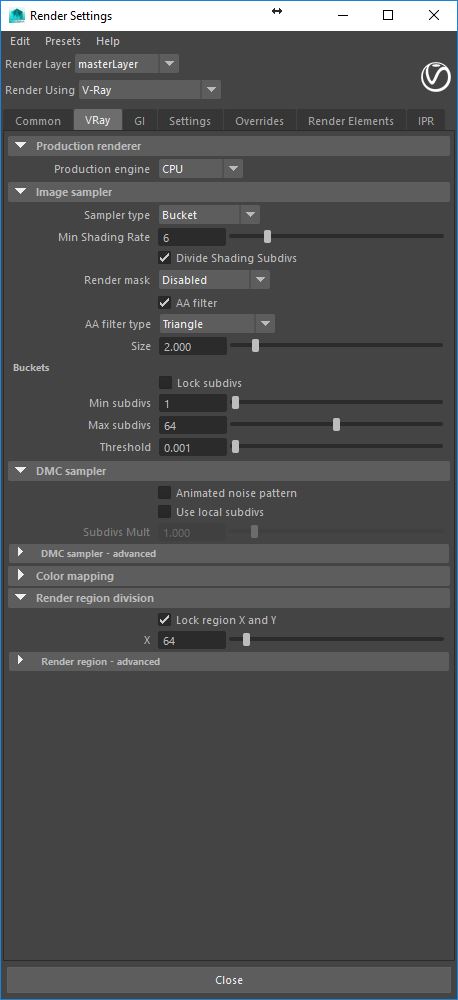
For the image sampler, I went with adaptive and kept an heart on the subdivision threshold, setting it to something around 0.001 for production quality. I used Triangle with the default settings for anti-aliasing to achieve a skillful balance betwixt sharpness and removing jagged edges. This filters piece of work in a sub-pixel level, and is much more accurate than applying filters afterwards over the rendered image.
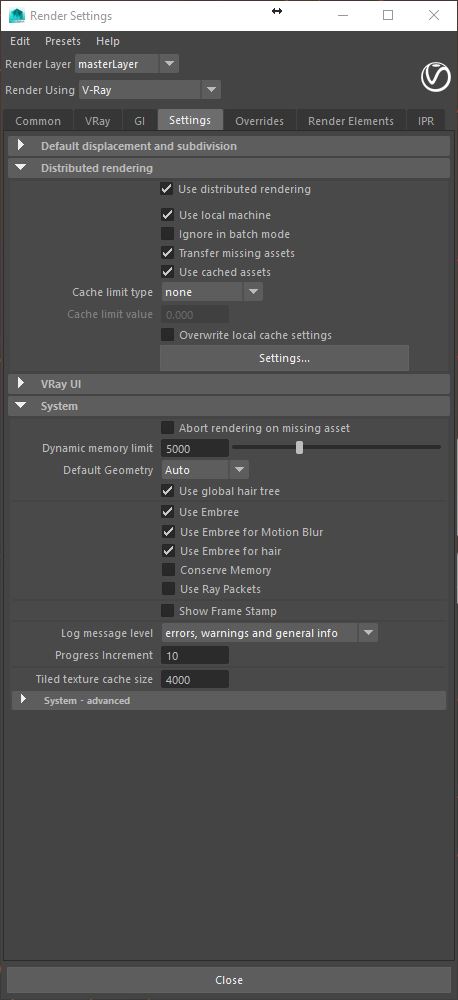
I was lucky to have access to more than computers, and then I used distributed rendering and lowered the return fourth dimension from around 70 to 10 minutes per frame. Don't forget to check "Transfer missing assets," and so that all the maps get used by all the machines.
The final touch
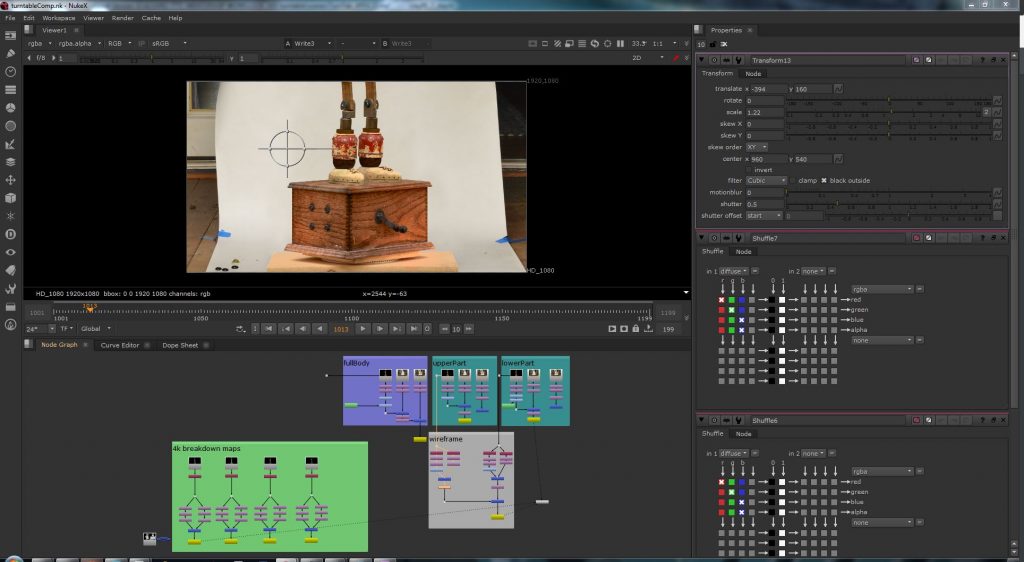
In one case all the renders were finished it was time to comp all the passes in Nuke, one of my favorite pieces of software. A slight color adjustment, defocus, and a background did the flim-flam perfectly. It's always a pleasure to work with Nuke, as the possibilities are endless if you lot have the proper render passes. In my example, I had the renders in multi map open exr files, which made it very easy to shuffle all the passes straight from the read node.
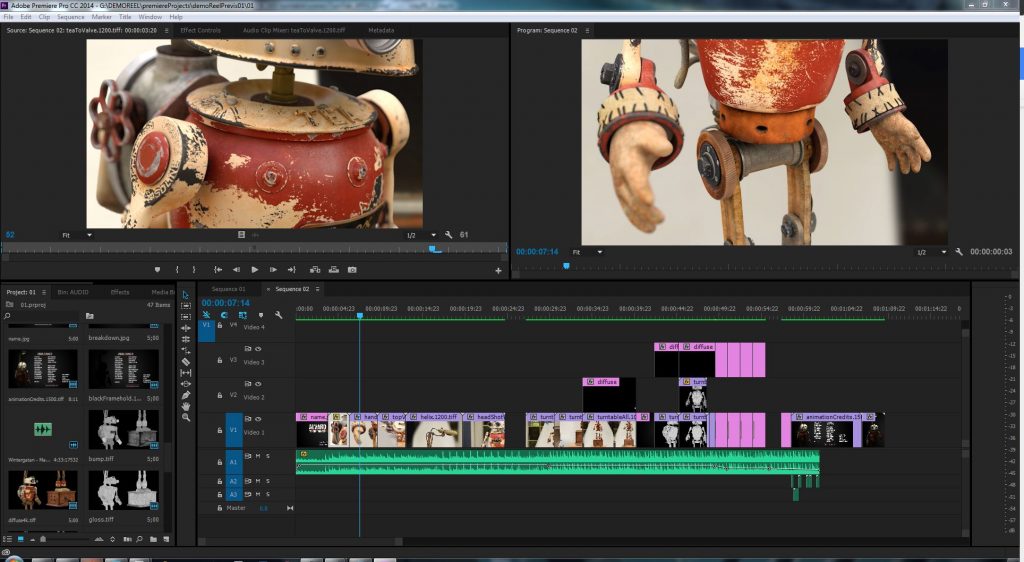
After comping, I edited the video in Premiere, keeping an eye on timing and rhythm. I already had a couple of music pieces selected, so I used the one that fit the theme. Finally I added the titles and created a cursory animation for the credits. It was squeamish to meet APEX come to life!
Chaos Group recently released V-Ray iii.5 for Maya with some awesome new features such as: adaptive lights – a new lighting algorithm that speeds up rendering in scenes with many lights; 5-Ray IPR – new in-procedure IPR starts instantly, updates faster and uses less memory; alSurface material – full general-purpose shader past Anders Langlands with layered SSS and glossy fresnel reflections pop for skin; GPU improvements and more. You lot can sentry the recording of the V-Ray 3.v for Maya release webinar to learn how you can use the new features.
If you lot desire to give the product a test run you can download a fully functional trial of 5-Ray three.5 for Maya , costless of charge.
Source: https://magazine.artstation.com/2017/04/apex-robot/
0 Response to "Look at This Piece of Potterythis Piece of Art Was Created Using Apex"
Postar um comentário